Android入门教程(2)
温习 基本xml语法
温习 基本视图中的几个属性
本节主要讲解组合布局 LinearLayout 和 RelativeLayout 的使用
使用 google search,查找 关键子 + android
组合布局
在一个界面需要展示多个 view 的时候,就需要用到 组合布局了。也就是 ViewGroup。用 ViewGroup 把多个 view 组合起来。
不能简单地把多个 view 放在一个 xml 文件中:一个 xml 文档中只能有一个 root view,其他的 view 应该放在 root view 里面
ViewGroup 也是一种 view,它是一种矩形的 view
如:LinearLayout 和 RelativeLayoutViewGroup 是 父view,它里面的其他 view,是其 子view。父view 可以控制 子view 的位置和方式
父view 和 子view 之间是 父子关系;子view 之间是 兄弟关系
线性布局 LinearLayout
LinearLayout 中的 view 可以按照水平(horizontal) 或者 竖直(vertical) 的方式排列
线性布局举例
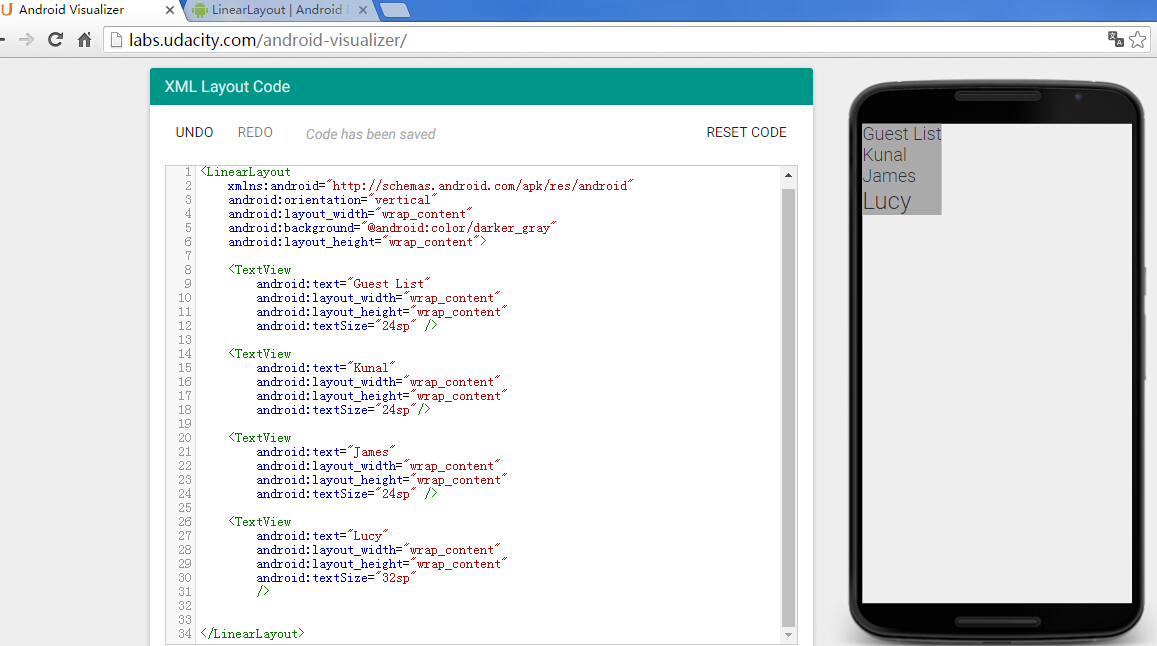
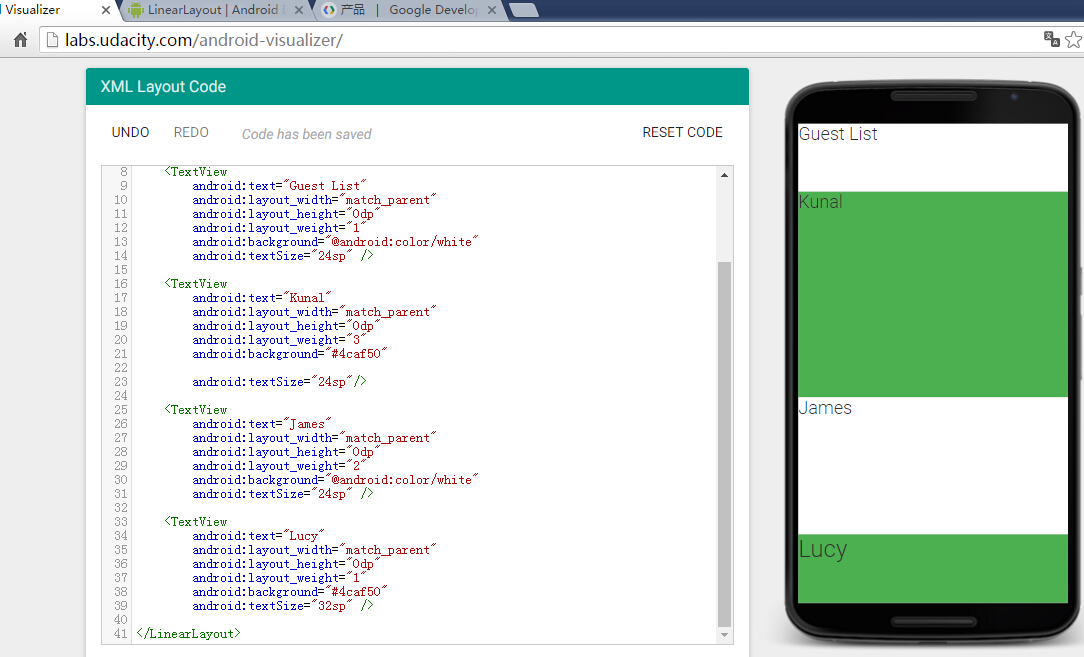
- 等权重子视图:在线性布局中,给各个子视图按比例分配空间
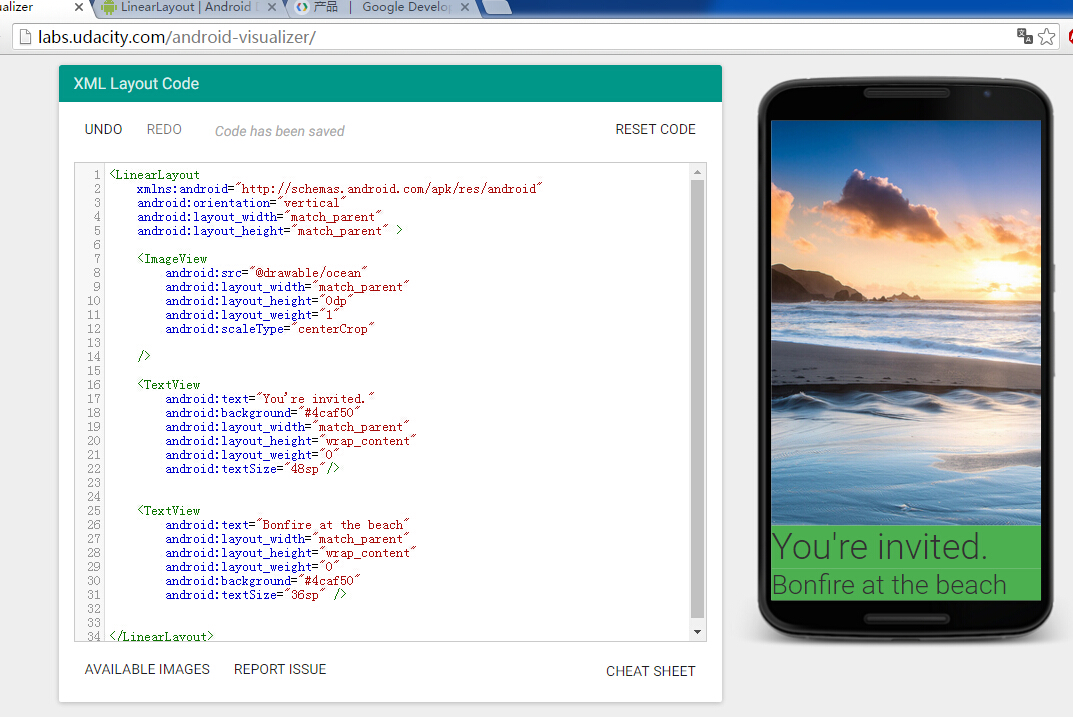
- 对于垂直线性布局,把子视图的高度android:layout_height设置为 0dp,权重andour:layout_weight设置为1(或者其他数值)
- 对于水平线性布局,宽度android:layout_width = 0,设置权重 android:layout_weight
设置权重以后,在不同的设备上,就可以按照同样的比例平分屏幕高度
设置权重的练习1
设置权重的练习2
相对布局 RelativeLayout
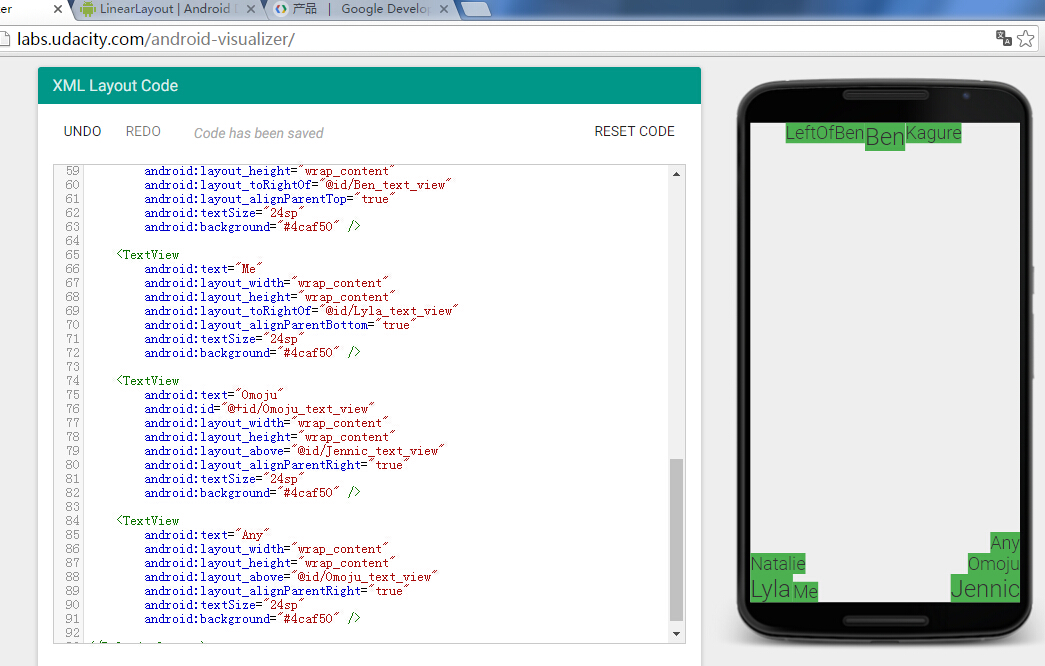
- RelativeLayout 中 view 的排列是相对的,比如 把 子view 放在 父view 的上面 或者 左边;
默认布局:左上角。可同时混搭多个对齐。
也可以是 子view 之间相对排列
相关的属性,值都是 true 或者 false
官方介绍
android:id=”@+id/name” 第一次声明需要用到”+”,以后再用,就不需要+了
android:layout_alignParentTop 与父视图上边缘对齐
android:layout_alignParentBottom 与父视图下边缘对齐
android:layout_alignParentLeft 与父视图左边缘对齐
android:layout_alignParentRight 与父视图右边缘对齐
android:layout_above 在参考视图的上方
android:layout_below 在参考视图的下方
android:layout_toRightOf 在参考视图的右侧
android:layout_toRightOf 在参考视图的左侧
android:layout_alignTop 目标控件和引用控件的上边缘对齐
android:layout_alignBottom 目标控件和引用控件的下边缘对齐
android:layout_alignLeft 目标控件和引用控件的左边缘对齐
android:layout_alignRight 目标控件和引用控件的右边缘对齐
android:layout_alignBaseLine 基于基准线对齐,基准线就是我们写英文字母那4行线的第三条
layout_centerInParent 表示与父控件在水平方向和垂直方向都对齐,处于正中央
layout_centerVertical 表示与父控件在垂直方向上对齐
layout_centerHorizontal 表示与父控件在水平方向上对齐
layout_alignStart 与引用控件的开始位置对齐
layout_alignStop 与引用控件的结束位置对齐
layout_alignParentStart 表示与父控件的开始位置对齐
layout_alignParentStop 表示与父控件的位置对齐
相对视图布局举例
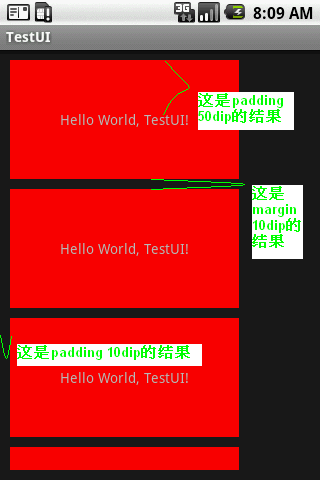
android:padding和android:layout_margin的区别
padding是站在父view的角度描述问题,它规定它里面的内容必须与这个父view边界的距离。margin则是站在自己的角度描述问题,规定自己和其他(上下左右)的view之间的距离,如果同一级只有一个view,那么它的效果基本上就和padding一样了。例如我的XML layout代码如下:
- android:padding和android:layout_margin举例
要点
- 记得使用 明明空间 “xmlns:android=””
- 熟练使用布局的几种属性值